
Simplified Galleries

My work is displayed in separate Galleries for your ease in perusing this blog. Simply click on the photo to go to the pertaining page....
Creative Tutorials
Tutorials are going in number order: The latest tutorial being the first...
TUTORIAL
No 14
"Personalised Nursery Alphabet"

Products I used:
- Dusty Curls Alphabet (DA0468) from the Dusty Attic
- Jo Sonjas White Paint
- Peter Rabbit wrapping paper (paper of your choice)
I have painted the Dusty Curls Alphabet with a plain white paint firstly. (Refer to previous intricate details tutorial – this is how I almost always do the first layer).
Step 2.
Simply some basic paper toll here, or fussy cutting as I hear it being referred to of late; cut out roughly 3 of the same design from the paper, then when you have a minute to sit down (I usually do in front of the TV) cut to the edge of the picture, but leaving off legs, arms etc as you go higher. Then using whatever way you prefer to add dimention to the layers, build them up. I use helmars dimentional glue most of the time.
Place the cut outs randomly over or under the letters.

TUTORIAL
No 13
Step by Step:
Sugar Plum Fairy - Christmas Tree
Materials You Will Need:

Materials You Will Need:
Dusty Attic Christmas Tree DA0648
Winter Fairy Tales Collection from Websters Pages
Step 1.
Paint the Tree white all over and then add some Diamond Sparkle adhered with glue.

Step 2. Gold heat emboss around the edges a little randomly.


Step 3.
Adhere Webster's Pages Christmas Tree image onto the medium size Dusty Attic Christmas Tree and sand around the edges. Cut into small pieces and slide under the larger tree.


Step 4.
Adhere white feathers, fussy cut roses from WP and a strand of bling is wrapped around the entire tree.

Step 5.
Fussy cut out 3 different shape stars from WP paper. Gold heat emboss edges and apply a layer of dimentional magic. Attach to each other and page with tape and chipboard pieces.

Step 6.
Cut out a house from the papers, wrap a piece of chipboard like a gift and I have used a carosel horse punch with the yellow papers.

Step 7.
Cut rows of green Christmas Tree image from the previous year's WP Christmas range and snip into edges like a fringe. Gold heat emboss edges and add clear Rock Candy before you adhere to tree.

Step 8.
Adhere some tiny pink rosebuds with white glue....and some bows (pre-tied) how lazy am I?
I loved every minute of making this tree and I hope you get some inspiration and have some fun with the Dusty Attic trees and Webster's Pages paper also...
TUTORIAL
No 12
Step by Step:
Monet’ Style Chipboard

Any Dusty Attic Chipboard of your choice, Water Colour Pencils, White Paper, Water, Paint Brush, Glue and Sanding tool.

Step 1.
F irstly glue the white paper to the chipboard.

Step 2
T hen after that has dried, draw with the water colour pencils. I have used the pencil on the side of the lead first, dragging it across the cloud, then pressed harder for the edges with a different colour.

Step 3
I then added some water to soften the pencil lines as you do with water colour pencils and

Step 4
F inally pressed off the excess paper while it was still wet. You could leave it like this for a different effect or file off the edges for this look.

There are plenty of options for this technique. I did like the look of just sticking the chipboard underneath the paper and running the pencils along it also, you could do a whole background paper in this fashion, its up to you what look you are going for ;) Have fun!!!
TUTORIAL
No 11

Step by Step:
Tinkerbell Gift Box
Materials You Will Need:
Products I used:
- Sweet Pea Border (DA) from the Dusty Attic
- Jo Sonjas White Paint
- Tim Holtz stain
- pink glitter glue
- various flowers
- Bazil cardstock
- personal invitation
- alphabet letters
- organza ribbon
- sizzix dies
Create the box using the "Explosion Box" instructions below.
Step 2
Decorate as desired, with photos, flowers, ribbons etc.

Step 3

Step 4


TUTORIAL
No 10

Fabulous, Floral Vintage Chandelier (DA0266 )
Products I used:
- Vintage Chandelier (DA0266) from the Dusty Attic
- Jo Sonjas White Paint
- Petite Roses (pink and white)
- Diamond Sparkle
- Pink Bling by Kaisar
- Pink ink
- Frosted Lace Stickles by Tim Holtz
- German Scrap
I have painted the Vintage Chandelier with a plain white paint firstly. (Refer to previous intricate details tutorial – this is how I almost always do the first layer)
Step 2
Then after that has dried I have drawn around the edges with a gold glitter pen. Run pink ink randomly over the top of the chandelier.
Step 3
I then added frosted lace stickles mostly all over.
Step 4
Cut a piece of the German scrap for the centre of the chandelier.

Step 5
Use Kaisar bling or other varieties for the shown points.

Step 6
Dot glue on flames areas and use Diamond sparkles for the flames.

Step 7
Alternate attaching pink and white roses for the candle stick parts of the chandelier.

Step 8
Just little gold colouring rubbed with finger everywhere to finish off your fabulous Vintage Chandelier!!!
Tutorial No. 1 (January 2011)


Tutorial No 2.

Treasure Box Tutorial
Fancy Trim #3 DA0469
Jo Sonja’s Titanium White Paint
Step 1.
Measure the required border and cut from scrap paper.
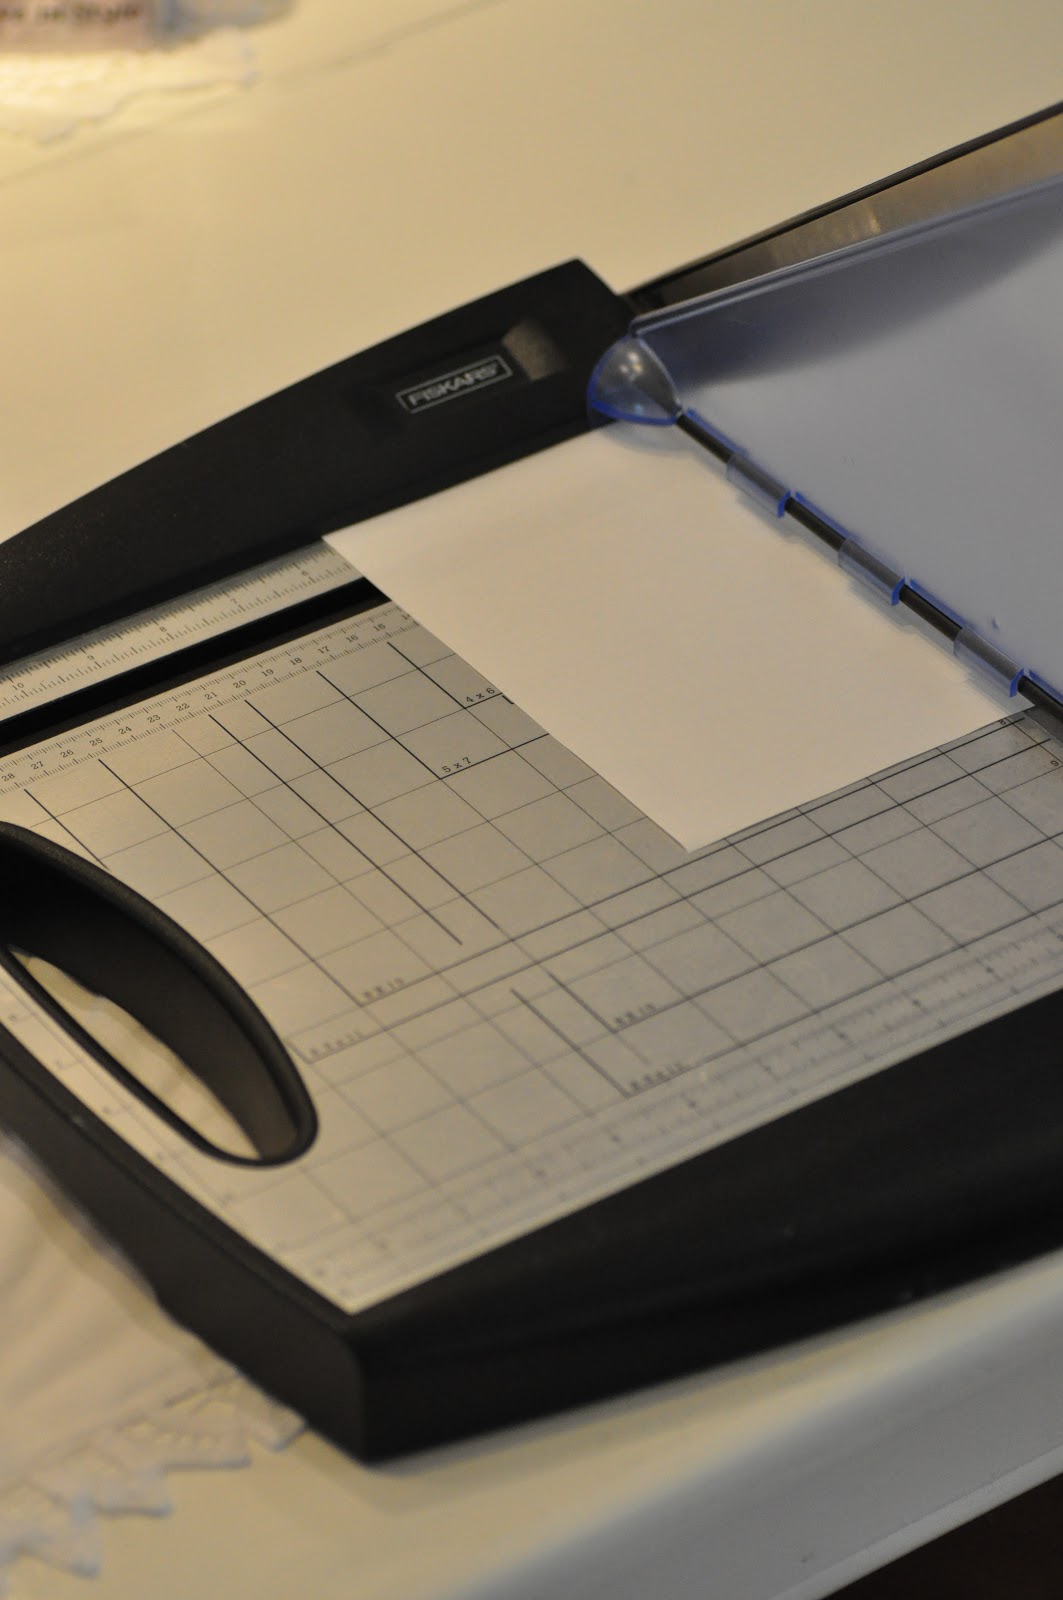
Step 2.
Place the Decorative Trim around the edges of the paper with double sided tape.

Step 3.
Cut into the corners. Remove excess and align the corners.

Step 4.
Using a make up sponge to squeeze the paint into the inner parts of the chipboard, gives exceptional coverage without the paint becoming blobby as the sponge soaks up the excess paint, giving a perfect coverage every time. Depending on the depth of colour that you are going for, this method may be applied many times to get the desired result.


TUTORIAL
No 3
Step by Step:
Oval Frame – Vintage Frame (DA 025)
Materials You Will Need:
Vintage Frame from the Dusty Attic (DA025), Gold Rub n Buff, Iridescent Medium and a foam paint brush.


Step 1.
I have painted the oval frame with a plain white paint first (see my previous border tutorial) and then added the iridescent medium over top with the technique shown in the photograph.


Step 2
T hen after that has dried I have put Rub n Buff directly on my finger to lightly run over the top of the raised parts of the iridescent medium. I would suggest practicing a little on the back or somewhere as it is easy to get heavy handed with the Rub n Buff, thus making it all gold!
Step 3
If you do find it isn’t quite how you want it however, it is very easy to simply add another layer of iridescent medium and start the process again. Extra layers for a deeper coverage are always also an option.

TUTORIAL
No 4
Step by Step:
Indian Head – Wings #1 (DA )

Materials You Will Need:
Dusty Attic Wings #1 (DA0499), Dimensional Magic, red gel pen, black fine liner ink pen and gold gel pen, brown ink.
Step 1.
I have rubbed one of the wings with brown ink, all over and around the edges.
Step 2
T hen I have coloured in between the lines with black fine liner and red gel pen.
Step 3
O nce the ink has dried I have given a top coat of dimensional magic.

TUTORIAL
No 5

Mini Dragonflies (DA 0518)
Materials You Will Need:
Mini Dragonflies from the Dusty Attic (DA0518), Gold Paint, German Scrap and Tim Holtz Stickles (lilac).
Step 1.
I have painted the mini dragonflies with gold paint using a make-up sponge (see my previous border tutorial for a great painting technique)
Step 2
T hen after that has dried I have use a snippit of a length of German Scrap for the spine of the dragonfly.
Step 3
I then simply added Tim Holtz stickles in a matching colour for my page.

TUTORIAL
No 6


Flutterbies and mini Butterflys
(DA#0389 & DA#0364)
(DA#0389 & DA#0364)
Materials You Will Need:


Step 1. - for Flutterbies
I have quite simply inked one of the Flutterbies (DA#0389) with Brilliance Ink as with the Brilliance Inks the sparkle/shimmer is quite stunning on its own.


Step 1. - for mini Butterflys


I have cut out one of the pink butterflys from the K & Co tag book.

 Step 2

T hen dabbed a small amount of glue on the mini Butterfly (DA#0364) to which the cut out will stick to nicely.


Step 3
Y ou then en need to use some fine chiseling tools to sand the edges and finish with a little more ink.


Explosion Box Instructions
Materials:
Four 12x12 sheets of cardstockEmbellish to the theme of your own choice
The Base:
Step 1:Take your 3 sheets of cardstock and trim them to size as per below:
- Bottom layer (box) - 12" x 12" (thick card stock like bazzill linens are preferable for strenth)
- 2nd layer - 11" x 11" (Ok to use patterned scrapbook cardstock for these 2 layers)
- 3rd layer - 10" x 10"
Step 2:
Next score 4 folds on each card layer as per the measurements below.
- Score the Bottom Layer 4" in from the sides
- Score the 2nd layer 3 ¾" in from the sides
- Score the 3rd layer 3 ½" in from the sides
Step 3:Cut out the corners from all 3 sheets.
- Embellish each of the four side panels on all three sheets as dsired. You may embellish both sides of each panel or just the top sides. Create pockets for tags, photo matts, use quotes, ribbon, brads etc. Adhere the bases together when you have finished embellishing the box.
The Lid:
- Trim the last piece of cardstock for the lid to 8"x8". Score folds similar to the first sheet at 2" from each side. Do not cut the corner squares at this stage.
- Score four more diagonal fold. Fold each corner up and adhere to the side to form the lid. Embellish as desired.
TUTORIAL
No 7
Ideas and Tips for:
Painting Chipboard – including fine details
Do you want to know how to get into those nooks and cranny’s of the gorgeous, more delicate chipboard designs?
Base Colouring
Whatever colour you chose for the base of your project is the colour best to start
“layering” your chipboard.
Tools
U sing a make up sponge, squeeze the paint onto sponge firstly and then fold into the inner parts of the chipboard. This gives exceptional coverage without becoming lumpy as the sponge soaks up the excess paint, giving a perfect coverage every time.
Depth
Depending on the depth of colour that you are going for, this method may be applied many times to get the desired result.
Storage
I store my make up sponges in airtight containers, removing the need to wash out the sponge after each use. I have several separate containers for different colours. The sponge can then be used next time it is needed by simply adding a little more paint!
TUTORIAL
No 8
Ideas and Tips for:
Double theChipboard – twice the fun!
I am such an extravagant person by nature and this idea is one I use alot. I figure if you are going to do something at all then you should do it well (or try to as is the case with moi).
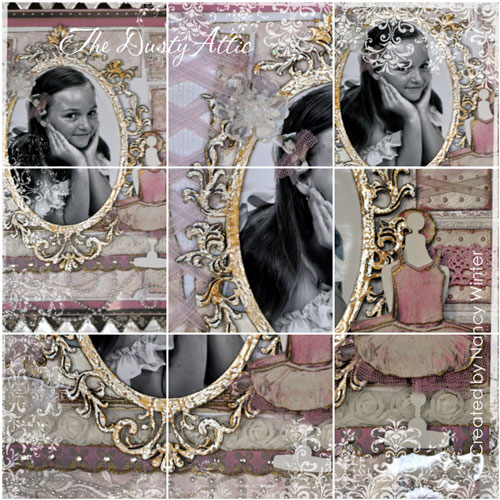
Baroque Frame Set - Square DA#0541
I quite often buy two of the same item and glue them together with white glue.

I particularly wanted to use the square frame in this instance as I like the corners to be all even and this was one way of creating that look.
TUTORIAL
No 9

I have used the Dusty Attic chipboard postage stamp here, as a little tip/technique. I use it on my photos to simulate the look of a postcard. This is fast becoming one of my favourite things to do, it just gives that "old world" look that I love so much.
...................................................................................
More tutorials coming soon
You may also like the Storage Tips section of my blog, which will also be updated regularly...
Where Women Create - Storage Tutorials

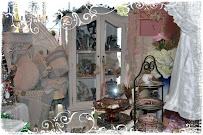
My Home Studio
Creative Tutorials

Step by Step Designs
Babies Gallery

Babies are God's way of saying "The World Should Go On"
Christmas Gallery

Here you will find all things Christmas
Ballerina Gallery

The Prima Ballerina Display
My Personal Gallery

Here you will find items about me
Mystical, Fairies and Fantasy Gallery

Here you will find a collection of Mystical and Fantasy items
Toys and Childrens Gallery

Aiming for a Younger Audience
Wedding Gallery

My Scrapbook.com Photo Gallery

Photos Only Gallery
A special section where you will find the photos that I made of yourselves!!! Email me and I will give you access to the full site
I was Featured at "Charity Wings"

I'd Rather Have Wings...

Than Have Things...
The Secrets of Life...the best kept

Currently Designing for...

Tomorrow's Memories
Proud to be designing for Manor House Creations

2012 to 2013
Previous Designer for:
If they say people look like their pets...

and Cats do as they please...
Success

The road to success is always under construction...
The Time To Relax Is...

When You Don't Have Time To Relax...
If Your Dog Thinks You Are Fantastic...

Don't Seek A Second Opinion...
Doesn't matter if you win or lose...

It's how you play the game.
Remember to regularly,

stop and smell life's Roses...If you can't find happiness along the road, you will not find it at the end of the road.
Everything you need, will come to you at the perfect time...

A lie can travel half way around the world,

before the truth has a chance to put it's shoes on...
Christmas in July - giveaway

Simply become a follower and I will chose 5 random winners at the end of "each" July from all of the followers. I will post up the names of the winners to contact me with postal addresses, Good Luck and thanks for your support! :)
Upcoming Events and Competitions

Evana, Jen & I SIA Sydney
About Me - Concise Biography

- Nancy Winter
- My work history is varied and diverse. From the high profile studios of NWS Channel 9, to the exciting aviation industry, I have a resume' with an extensive list of skills and experience.
I reside in sunny Australia.
The main purpose of this blog was that it was started out of necessity but has grown into something I enjoy.
“To Do What You Love, and Feel That It Matters, What Could Be More Fun?”.
I believe this particular industry promotes self esteem in many, whilst being part of a Design Team helps businesses and friends but most of all I love all the fantastic messages that one can give to another through this avenue. It assists me in my endeavour to leave the world a better place… (and as Barbie would say at the beauty pageant "and I wish for world peace";) Hoping that you find some inspiration from my work!
Email Me

My Blog Badge

feel free to grab my link and share on your own blog...www.nancywinter.blogspot.com
Page Views
Since March 2011
Maja Designs

Do you like the idea of an album of your own but don't have the time or inclination to create it?

There are alot of options available to you...click on the telephone photo....
Gorgeous Digital Photo Books

by Webster's Pages
USA Retailer


CSI - Cool American Website
Color, Stories, Inspiration
The Color Room

Kindred Website to CSI
Donna Salazar

A project I made with her papers...
Graphic 45

Outstanding Collections!!! - a page I created with one range...
Pages in Time

Bella Creations

Thank you

Thanks for stopping by for tea and please feel free to copy me (exceptions below) Please feel free to copy any of the techniques I have used for your personal use and I sincerely hope you leave with some inspiration and visit regularly for more...
Fantastic Designers that I Love:- Mistra Hoolahan

Mistra uses lots of different techniques when it comes to finishes on her chippy, she loves lots of texture, bling and flowers.
Gabrielle Pollaco - Canada

Gabrielle's style is, well, Gabrielle! Soft and feminine, always delicate and dreamy!
Maiko Kossugi - Japan
Mai's style is dreamy and delectable, always soft and so full of love.
Iris Babao Uy - Philippines

Iris has a wonderful cheerful, crisp & clean style... they always make you happy after looking at them!
Natasha Narango Aguirre - USA - Administration

Natasha's signature style includes her stunning ribbon weaving with eyelets and her hand stitching, she makes these an art form in themselves.
Karola Wiztak - Poland - Sponsored Designer

Anna Dabrowska- Pekocka - Poland

aka Finnabair - Finn has a unique style that is a pure vision of misting, masking and paints.